Khanom Chan - Steamed Rice Cake
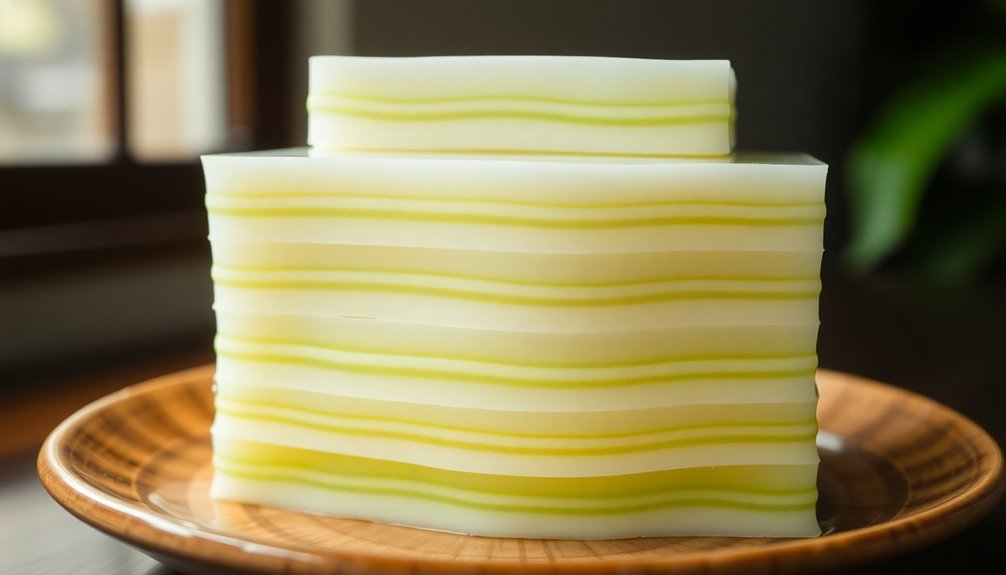
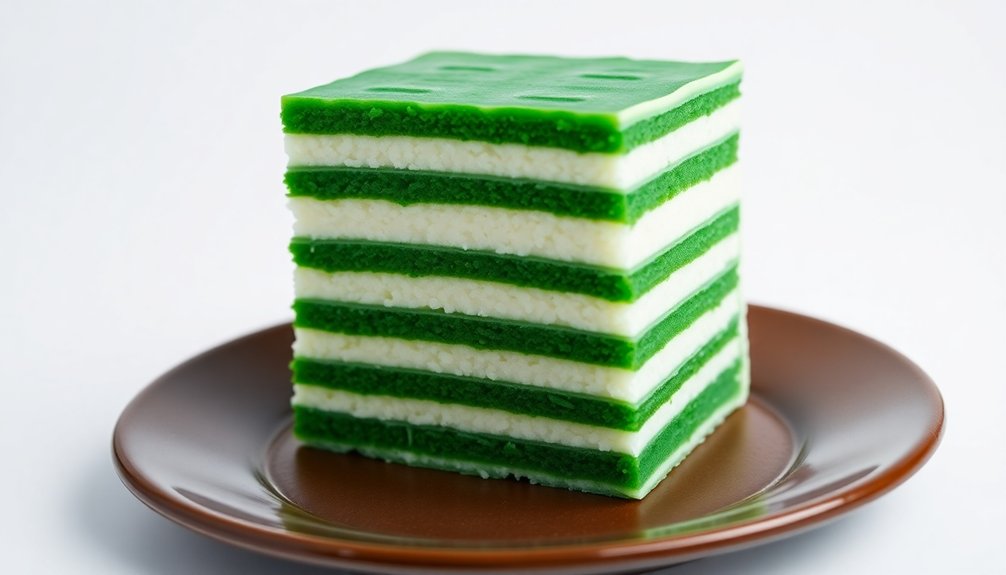
You'll find Khanom Chan to be a cherished Thai dessert dating back to the Ayutthaya period, featuring delicate layers of steamed rice cake infused with pandan and coconut milk. Its nine distinctive green and white layers symbolize prosperity in Thai culture, making it a staple at ceremonies and celebrations. While its preparation requires patience and precision, mastering this traditional dessert's careful layering technique rewards you with an elegant treat that carries centuries of culinary heritage.
Key Takeaways

- Khanom Chan is a traditional Thai layered dessert made with rice flour, coconut milk, and pandan, creating alternating colored layers.
- Each layer requires 3-4 minutes of steaming at medium-low heat, with a total preparation time of 60-70 minutes.
- The dessert typically features nine layers in central Thailand, symbolizing prosperity and representing ancient Thai temple architecture.
- Key ingredients include rice flour, tapioca flour, coconut milk, sugar, pandan juice, salt, and vegetable oil.
- The final product has a soft, chewy texture with subtle sweetness and aromatic pandan flavor, served cut in diamond shapes.
History
Although its exact origins remain unclear, Khanom Chan emerged as a traditional Thai dessert during the Ayutthaya period (1351-1767).
You'll find that this layered delicacy holds deep historical significance in Thai culture, particularly during ceremonies and celebrations.
The dessert's distinctive appearance, with its multiple colorful layers, represents the stepped architecture of ancient Thai temples.
You'll discover that dessert traditions vary by region, with some areas preferring more layers while others opt for fewer but thicker ones.
In central Thailand, you'll commonly encounter nine layers, symbolizing prosperity and advancement.
Throughout its history, Khanom Chan has maintained its cultural importance while adapting to regional variations in ingredients and preparation methods, making it a cherished part of Thailand's culinary heritage.
Recipe

Ingredients:
- 200g rice flour
- 100g tapioca flour
- 400ml coconut milk
- 200g sugar
- 200ml pandan juice
- 1/4 tsp salt
- 2 tbsp vegetable oil
Instructions:
- Mix rice flour and tapioca flour in a bowl.
- Combine coconut milk, sugar, and salt in a pot.
- Heat the mixture until sugar dissolves completely, don't boil.
- Divide the coconut mixture into two portions.
- Add pandan juice to one portion.
- Gradually add the flour mixture to both portions, stirring until smooth.
- Strain both batters to remove lumps.
- Grease an 8-inch square pan with oil.
- Steam the pan for 5 minutes.
- Pour a thin layer of white batter (about 3-4 tablespoons).
- Steam for 5 minutes.
- Pour a thin layer of green batter.
- Steam for 5 minutes.
- Repeat alternating layers until all batter is used.
- Steam final layer for 10 minutes.
- Let cool completely.
- Cut into diamond or rectangular shapes.
Steaming time: 60-70 minutes
Serves: 12-15 pieces
Cooking Steps

To make traditional khanom chan, you'll first combine coconut milk with pandan extract and sugar before mixing it with rice flour to create the signature batter.
You'll then steam the mixture in layers, carefully adding each new portion only after the previous one has partially set in your mold.
Once all layers are complete, let the cake cool completely before cutting it into diamond or rectangular shapes for serving.
Step 1. Prepare Coconut Milk Mixture
Before preparing the batter layers, you'll need to create the essential coconut milk mixture that gives Khanom Chan its rich, creamy texture. Fresh coconut milk offers significant coconut benefits, including natural sweetness and healthy fats, though milk alternatives like packaged coconut cream can work in a pinch.
- Heat 2 cups of coconut milk in a medium saucepan over low heat until warm but not boiling.
- Add 1 cup of granulated sugar and 1/4 teaspoon of salt, stirring until completely dissolved.
- Remove from heat and divide the mixture into two equal portions.
- Add pandan extract or essence to one portion for the green layers, leaving the other portion white.
This coconut milk mixture serves as the foundation for your Khanom Chan's signature layers and flavor profile.
Step 2. Steam Rice Flour Mixture
Steaming the rice flour mixture properly marks the critical phase that determines your Khanom Chan's texture and consistency.
Pour your first layer of the flour mixture into a 9-inch greased pan, guaranteeing it's about 1/4 inch thick. Place the pan in your steamer over medium-high heat and steam for 3-4 minutes until the layer sets but isn't completely firm.
For successful steam techniques, maintain consistent heat and avoid opening the steamer lid frequently.
Once the first layer is set, add the next layer of contrasting color, keeping the flour consistency uniform throughout. Continue this layering process, steaming each addition for 3-4 minutes.
You'll need to work quickly between layers to prevent cooling, which can affect the cake's adhesion. The final layer requires 5-6 minutes to guarantee complete cooking.
Step 3. Layer Into Steaming Mold
The precise layering process begins with pouring a thin, even stream of the coconut mixture into your preheated mold, ensuring it's exactly 1/4 inch deep.
Traditional layering techniques require patience and attention to detail as each layer must steam completely before adding the next.
- Steam each layer for exactly 4 minutes with the lid slightly ajar to prevent condensation from dripping onto the surface.
- Pour the next layer carefully over the back of a spoon to prevent the mixture from breaking through the previous layer.
- Alternate between white and pandan-colored layers, maintaining consistent thickness throughout.
- Continue the steaming methods and layering process until you've used all the batter or reached your desired height, typically 8-12 layers.
Each layer should be firm but still slightly sticky to the touch before adding the next.
Step 4. Cool and Set Layers
Once you've completed the final layer, remove the mold from heat and let it rest uncovered for 15 minutes at room temperature.
The layering techniques used in Khanom Chan require proper cooling methods to achieve the perfect texture and consistency.
After the initial rest period, transfer the mold to the refrigerator for at least 2 hours or until completely set.
Don't rush this process, as proper cooling guarantees the layers bond together firmly.
You'll know the dessert is ready when it feels firm to the touch and the layers don't separate when gently pressed.
Once set, carefully run a knife along the edges of the mold.
Turn it upside down onto a cutting board and gently tap to release.
Cut the Khanom Chan into traditional diamond or rectangular shapes before serving.
Step 5. Cut and Serve Dessert
After your Khanom Chan has fully set, prepare a clean cutting board and sharp knife for precise slicing.
For traditional dessert presentation, follow these steps to achieve beautiful diamond-shaped pieces:
- Remove the Khanom Chan from its mold by gently pulling the sides and inverting it onto your cutting board - the oldest layer should now be on top.
- Using a sharp knife dipped in hot water, make parallel cuts lengthwise about 1 inch apart, wiping the blade clean between cuts.
- Turn the cake 45 degrees and make another set of parallel cuts to create diamond shapes, each measuring roughly 1.5 inches.
- Arrange your diamond-shaped pieces on a traditional serving plate lined with banana leaf for authentic serving suggestions, keeping the layers clearly visible.
Cooking Tips

Successful preparation of Khanom Chan requires careful attention to temperature and steaming time.
You'll want to maintain steady steam throughout the cooking process, keeping the heat at medium-low to prevent bubbles from forming in your layers.
Don't rush the steaming - each layer needs 3-4 minutes to set properly.
For the best cooking techniques, verify your batter isn't too thick or thin - it should coat the back of a spoon smoothly.
If you're making ingredient substitutions, you can use artificial pandan flavoring instead of fresh pandan leaves, though the taste won't be as authentic.
When adding new layers, always pour the batter gently and in a circular motion to avoid disturbing the previous layer.
You'll know each layer is ready when it's firm but still slightly sticky to touch.
Final Thoughts

While Khanom Chan requires patience and precision to master, the satisfaction of creating these delicate, translucent layers makes the effort worthwhile.
When you've mastered this traditional Thai dessert, you'll appreciate both its cultural significance and the art of savoring flavors in each bite.
Here's what makes Khanom Chan truly special:
- The dessert's layered appearance represents the ascending levels of spiritual growth in Thai culture.
- Its translucent beauty makes it a cherished offering during important ceremonies and celebrations.
- The combination of coconut and pandan creates a harmonious balance that's distinctly Southeast Asian.
- You'll find that making Khanom Chan connects you to generations of Thai cooks who've preserved this culinary tradition.
Frequently Asked Questions
How Long Can Khanom Chan Be Stored at Room Temperature?
You'll want to consume this dessert within 2-3 days under proper storage conditions at room temperature. Its coconut milk content affects shelf life, so keeping it covered is essential.
Where Did the Distinctive Green Color of Khanom Chan Originate?
You'll be amazed that the mesmerizing green hue comes from crushing the tropical pandan plant's leaves. This natural food coloring holds deep color significance in Southeast Asian culinary traditions.
Can You Make Khanom Chan Without Using Pandan Leaves?
You can make this dessert without pandan by using alternative flavorings like vanilla or coconut. For the green color, try natural colorants like matcha powder, spinach juice, or butterfly pea flower.
Why Does My Khanom Chan Sometimes Develop a Rubbery Texture?
You're barking up the wrong tree if texture issues plague your dessert. Recipe adjustments are needed - you're likely using too much tapioca flour or overworking the batter during mixing.
What Causes the Layers to Separate After Cutting the Cake?
Your layers can separate if you don't achieve proper layer adhesion between steamed portions. Inconsistent texture consistency and letting layers cool too much before adding new ones affects bonding.
